I wasn’t always crazy about bone broth but that changed 3 years ago when I paid a visit to my acupuncturist. It was my first meeting with her and at the end of that consultation, she delivered a startling observation – I was suffering from hormonal imbalances (basically my yin and yang were not quite with it) – which I was thankfully, blissfully unaware of!
She then proceeded to whip up a long list of “to-dos” before our next appointment, meant to make a start at fixing me, and on the list, was bone broth. I was no stranger to Bone Broth. My grandmother made bone broth quite a lot. She frequently had a large cauldron simmering for hours on the stove. However, making bone broth wasn’t a process I had indulged in as a single and later, married professional with a busy schedule. But now, give the verdict of my acupuncturist, I knew it was time to rekindle my relationship with bone broth.
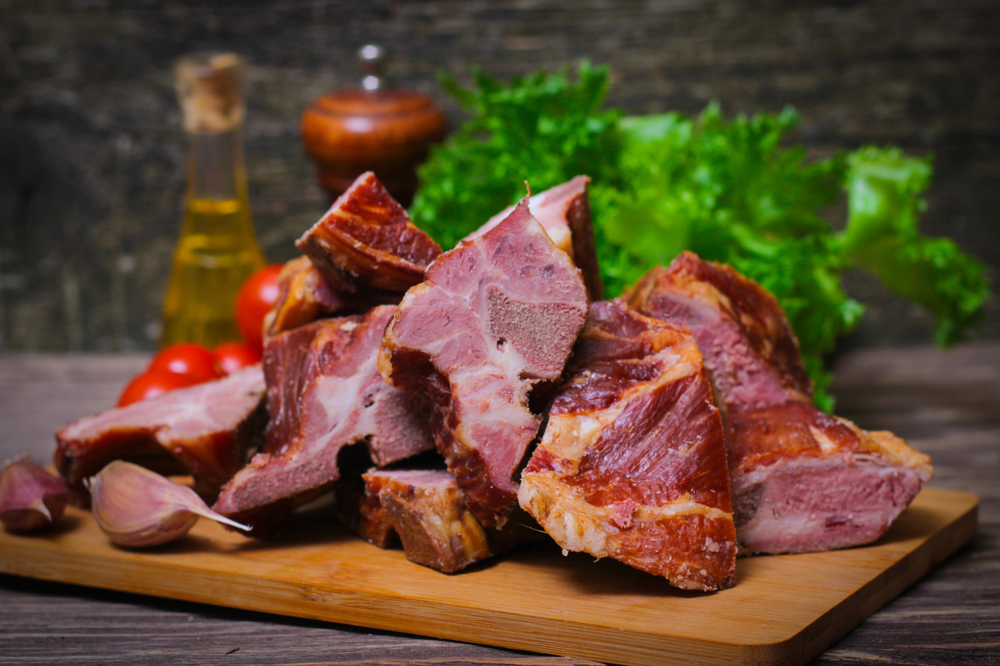
Bone broth is essentially stock made from bone that has been simmered for hours, or sometimes days. This long slow process of cooking allows for the extraction of vitamins, minerals, amino acids, and vital proteins that your body needs in order to thrive. In fact bone broth has been touted as a magic superfood that can heal digestive issues, revive tired muscles, and support the growth of healthy hair and nails.
The following important tips will ensure you get the most out of your bone broth:
1. Get into the habit of making your own bone broth
Store-bought bone broth may be nutritionally inferior to your home-made broth due to the cooking method used and is more likely to contain large amounts of preservatives. Commercial broth is typically made by pressure cooking. This ensures the flavours are extracted rapidly, but this could adversely affect nutrient extraction. Additionally, the high heat that these broths are exposed to post-packaging to ensure stability, is a process that could destroy the nutrients in the broth. In short, you are better off making your own bone broth. If you decide to make your bone broth, it is not that difficult. The below is a step by step guide on making your own bone broth at home, and is simple enough to be used by beginners.
2. Blanch Your Bones
This step removes the impurities from the bones and leaves you with just pure goodness. When you make bone broth, the scum rises to the top of the broth. Scum is largely animal fat, from the bone marrow and connective tissues that are being broken down during the cooking process. I’ve talked previously about the reasons you should consume grass-fed beef and in turn support local farmers and here’s yet another reason.
Well, you know the saying – Garbage In, garbage Out? This is especially true with bone broth. If you are using bones from a commercial feedlot animal, which has been reared on processed food, and fattened on antibiotics and hormones, well guess where these undesirable residue ends up? Yep, you guessed it – It ends up in the adipose tissues (also known as fatty tissue). You really don’t want to, and should not consume that!
If your bones from grass-fed beef, you can leave the scum in, as this will add to the flavour, but in turn increase the calorific content of the final broth. , If you are looking to make a lean version of the broth, it is a good idea to remove the scum.
To blanch, cover the bones with cold water, bring to a boil. With heat still on high, allow bone to simmer aggressively for 20 minutes. Remove from heat, and drain the liquid and scum away.
3. Roast the Bones
Roasting browns the bones, and this allows the flavour to deepen and develop rewarding your broth with deeper, and well-rounded flavours.
To roast, place all of the bones that you have just blanched on a baking sheet. Preheat oven to 350 degrees and roast until bones are well-browned (40 – 50 minutes)
4. Ease up on the Vegetables
A good bone broth needs only a handful of aromatic herbs and spices. You should only add vegetables towards the end of the simmering process – preferably 3 -4 hours to the end of the cooking. First of all, you only need a few hours of cooking to extract the nutrients and flavour out of vegetables, and secondly, the shorter cooking time will help prevent that bitter taste that accompanies some broths, which is a result of potassium leaching out of the vegetables when in contact with water.
5. Simmer, simmer, simmer
A good broth needs time for the flavours to come together. If you have the luxury of time, then simmer for up to 48 hours. If you don’t have the time, try to simmer for a minimum of 6 – 12 hours.
I have made this bone broth with 3 traditional african spices – Alligator Pepper or Grains of Paradise, African Negro Pepper of Grains of Selim and Jamaican or Calabash Nutmeg. These spices form the base of the Nigerian Pepper soup – a very wholesome and hearty soup.

- 2 kg grass-fed beef bones
- 4 litres cold water
- 2 onions large, roughly chopped
- 3 carrots large, roughly chopped
- 2 tbsp alligator pepper crushed or ground
- 2 tbsp jamaican nutmeg crushed or ground
- 2 tbsp african negro pepper crushed or ground
- 1 garlic clove
- Place the beef bones in a Dutch oven. Cover the bones with cold water, bring to a boil. With heat still on high, allow bone to simmer aggressively for 20 minutes. Remove from heat, and drain the liquid and scum away.
- Preheat the oven to 350°C. Place all of the bones that you have just blanched on a baking sheet. Roast until bones are well-browned (40 - 50 minutes).
- Transfer the bones to the Dutch Oven and add 4 litres of water, along with the spices (alligator pepper, negro pepper and jamaican nutmeg). Bring to a low boil, skimming any scum that rises to the surface. Reduce the heat to low and simmer for 6 - 12 hours, adding water as needed to keep the bones covered.
- About 3 hours to the end of the simmering, add the garlic, onions and carrot. Simmer for another 3 - 4 hours.
- Discard the bones and strain through a fine sieve. Allow to cool completely, and then transfer to storage jar or bowl and refrigerate. If you making a batch for use later than a week, then transfer the cooled broth to a freezer storage bag, for freezing. This should last about 6 months, if unopened.
Is this recipe right for you?
Afro-fusion Food Lover.
Sustainable Food Advocate.
Completely nuts about Avocado.


